Searching4Zen

French

Restaurant Eléonore

No Comments

It was our last night staying in Monpazier and we decided to have dinner at Restaurant Eléonore. It was a short walk from the house we were staying at, which makes it so nice to be able to enjoy yourself and not worry about the drive home.

I had the à la carte menu with a selection of three plates while Jo Ann had the menu du jour so we were able to have a sample of both menus.

Everything we had that evening was superb and the restaurant has a good (albeit limited) selection of wines from the area and Bordeaux and which were reasonably priced.

The service was outstanding and totally matched the quality of the food and the wine. We strongly recommend this restaurant.

For more information about the restaurant you can check out their website,  The Michelin Guide or TripAdvisor.

Restaurant Eléonore en Monpazier

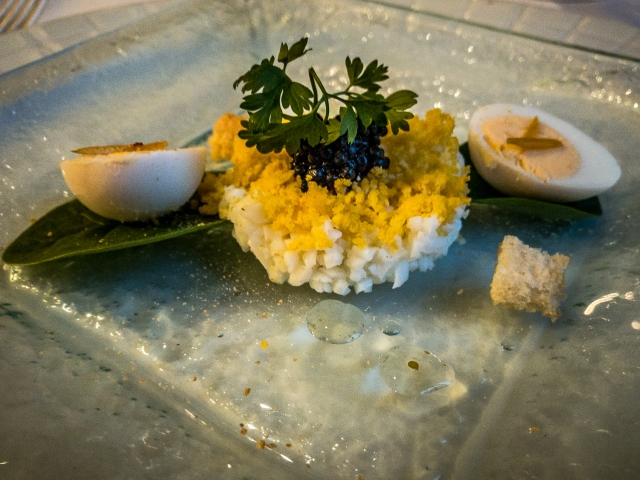
Mimosa with Quail Egg, Citron Confit and Cavier, a wonderful Amuse Bouche.

Restaurant Eléonore en Monpazier

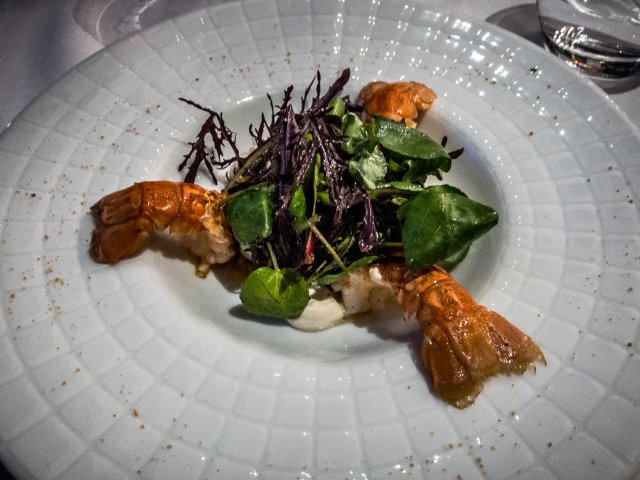
Queues de Langoustines, with a condiment of mangue-papaye and crème coco au ccombawa.

Restaurant Eléonore en Monpazier

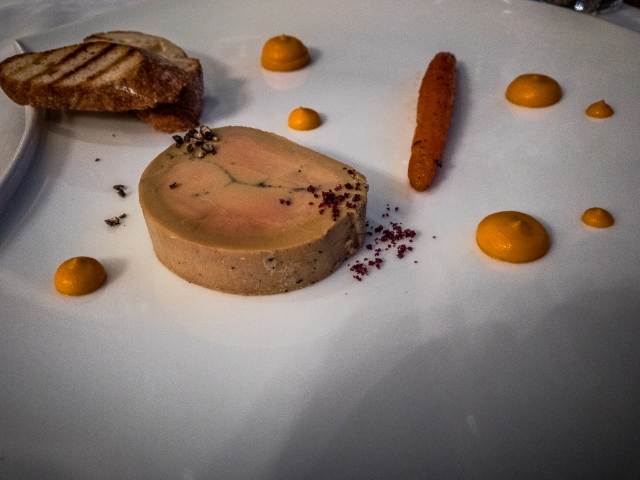
Foie Gras Mi-cuit Eléonore, wiht fine créme carottes and walnut oil dusted with a red wine sea salt. Very Yummy!

Restaurant Eléonore en Monpazier

Choco-Caramel-Café, with a creéme glacé sirop d’érable and noix pécan.

Restaurant Eléonore en Monpazier

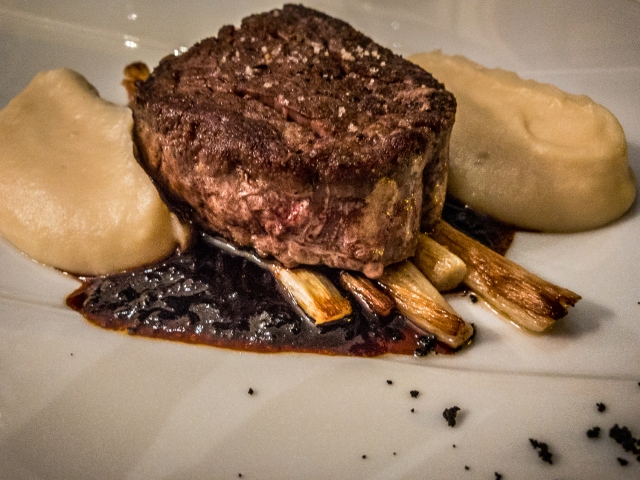
Filet de bœf with racines de persil au beurre noisette, white asparagus and a sauce of port and Péridord truffes.

Restaurant Eléonore en Monpazier

Dos de Saumon with perles de Savoie à l’encre de seiche, leeks and ginger done in papillote and a watercress sauce The Perles de Savoie à l’encre de seiche is pearls of black ink pasta

Restaurant Eléonore en Monpazier

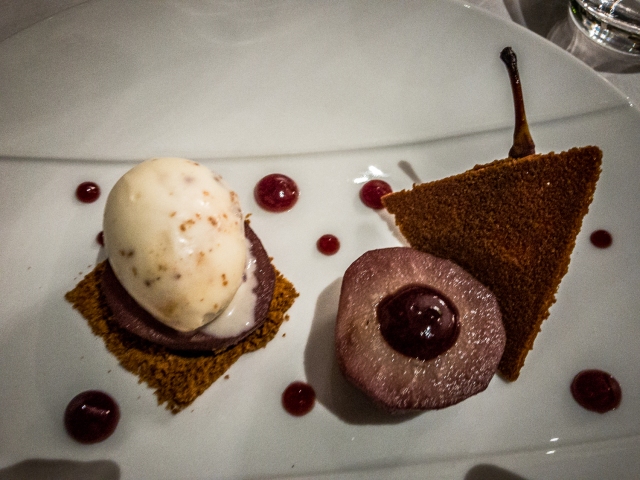
Pears poached in wine with a speculoos ice cream and an almond cookie.

Restaurant Eléonore en Monpazier

Château Terre Vieille Pécharmant 2010, an excellent choice for the night’s meal.

Restaurant Eléonore en Monpazier

Menu de Restaurant Eléonore à la carte

Restaurant Eléonore en Monpazier

Menu Edward the menu of the day

How to Make a Custardy French Omelet

No Comments

A very good tutorial on how to make a perfect French omelet. I struggle with this and have found that this tutorial is very helpful. The only part I do not like is that it is imperative that you use a non-stick pan, but I hate the thought of have such a pan in our kitchen.

Click to read the article at Bon Appétit.

Instructions

  1. Use the freshest eggs you can find. If you’re buying eggs from the farmers’ market, ask your farmer for large ones.
  2. For an evenly cooked omelet, you need smooth eggs. So take a whisk to ’em and incorporate the whites and yolks until you’re left with an even mixture with no white strands or pieces of yolk floating around. (You’re not trying to whip the eggs, you’re just trying to incorporate all the disparate bits.) If you’re not sure if your eggs are fully mixed, lift your whisk up in the air. If the eggs fall back into the bowl in a smooth, uniform stream, they’re ready.
  3. Use a nonstick pan. Nothing is more important to achieving the perfect roll than using a nonstick pan.
  4. Start your pan on medium to medium-low heat. When you add butter to the pan, it shouldn’t make a sound (that means no immediate sizzling or foaming.) Instead, you want the butter to gently melt into the skillet. When you start to see a few little butter bubbles, add the eggs. Again, you shouldn’t hear anything when the eggs hit the pan.
  5. Make sure to season in the pan. Season the omelet mixture with kosher salt and black pepper right in the skillet as they begin to cook. And now, it’s time to stir.
  6. This is the key moment when egg becomes omelet. Start stirring your eggs as soon as you add them to the pan to make sure nothing is sticking to the bottom. Stirring also helps to prevent curds of cooked egg from forming faster than it takes the entire mixture to cook. To further ensure the eggs cook evenly, vigorously shake the pan in a circular motion as you stir. Every so often, scrape down the sides of the pan to make sure no bits of egg overcook. One last note about this step: It will probably take longer than you want it to. Just remember, it’s a marathon, not a sprint—your patience will be rewarded.
  7. Remember what we said about this being a marathon? Exert one final push of patience and let your soon-to-be-omelet sit, off the heat, for one minute. This will help the bottom of the omelet finish cooking (translation: easier rolling) without running the risk of overcooking the whole caboodle.
  8. Holding the skillet handle in your left hand at a slight angle, tilt the pan away from you and gently begin coaxing your omelet into a roll. Once you’ve made your first roll, add a pat of butter to the skillet to help loosen it up the rest of the way.
  9. While you’re rolling, go for about 1″ intervals, as opposed to a tight cigar-style roll. Once the omelet is rolled and all the way at the other end of the pan, tip the pan over onto the center of a plate, using your spatula to help you get the omelet to sit seam side down.
  10. You thought we were done with butter here? Oh. Oh, no. Give your perfectly plated omelet a final rub with a pat of butter to give it a glossy sheen. Finish with a sprinkle of fleur de sel and finely chopped fresh chives. Take a moment to admire. Eat!

This is our step-by-step recipe for the classic French omelet, but in Ludo’s version, he fills it with a bit of Boursin cheese, a totally delicious and acceptable addition. You can get that (almost identical) recipe here: Ludo Lefebvre’s Omelet.